How to Build Floating Shelves
Floating shelves look like they defy gravity. They don't — they just have their hardware hidden inside. Once you understand the cleat method, you can hang shelves anywhere and trust them with real weight.
Floating shelves are one of the best beginner builds going. The material cost is low, the cut list is short, and the finished result looks like something you’d pay a lot for at a furniture store. The trick — the thing that makes them look clean and hold weight — is the cleat.
How the cleat method works
A cleat is a beveled strip of wood. One half screws to the wall (bevel facing up and out), the other half is glued inside the shelf (bevel facing down and in). The shelf drops over the wall cleat and the two bevels lock together. The weight of anything on the shelf drives the joint tighter, not looser. Done right, a single shelf can hold 50+ pounds with no visible hardware.
What you’ll need
Tools:
- Circular saw or miter saw
- Drill/driver
- Level (a 48“ level is ideal)
- Stud finder
- Tape measure and speed square
If you’re still building out your kit, our beginner tool guide covers exactly what to buy first.
Materials (per shelf, 36“ long × 8“ deep × 2“ thick):
- 1× 1×8 pine or poplar at 36“ — top face
- 1× 1×8 at 36“ — bottom face
- 1× 1×4 at 34“ — back cleat (ripped to 1.5“ wide on each face)
- 1× 1×4 at 34“ — side support strips (optional, for extra rigidity)
- Wood glue
- 2.5“ screws (for wall cleat, into studs)
- 1.25“ pocket screws or finish nails (for box assembly)
- Sandpaper: 120 and 220 grit
- Finish of choice
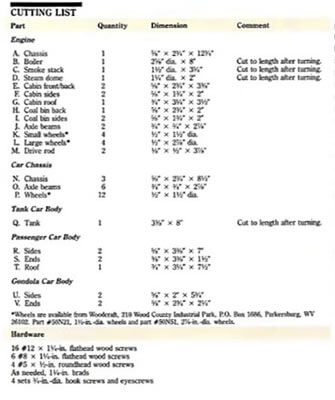
The cut list
| Part | Material | Size | Qty |
|---|---|---|---|
| Top/bottom faces | 1×8 | 36“ | 2 |
| Back cleat (wall half) | 1×4, ripped 45° | 34“ | 1 |
| Back cleat (shelf half) | 1×4, ripped 45° | 34“ | 1 |
| Side strips | 1×2 | 6.5“ | 2 |
Cut your cleat stock first by ripping a 1×4 diagonally at 45 degrees down its length. You’ll end up with two mirror-image wedges — one goes in the shelf, one goes on the wall.
Step by step
1. Build the shelf box. Glue and nail or pocket-screw the top face to the bottom face with the side strips in between, leaving the back open. This is a hollow box. Keep it square — clamp it and check the diagonal measurements before the glue grabs.
2. Glue the shelf cleat inside. Run glue along the bevel face of one cleat half and press it into the back opening of the box, bevel pointing down and toward the wall. Let it cure fully before moving on.
3. Find your studs. Use a stud finder and mark two or more stud locations at your shelf height. Most walls have studs at 16“ on center, so a 36“ shelf will hit at least two. Hitting studs is non-negotiable for anything weight-bearing — drywall anchors alone will let you down.
4. Mount the wall cleat. Hold the wall cleat in position (bevel up and facing you), check it with your level, and drive 2.5“ screws through it into the studs. Two screws per stud is better than one.
5. Hang the shelf. Tilt the shelf at a slight angle, hook the shelf cleat over the wall cleat, and drop it flat. It should sit snug with no wobble. If it rocks, the wall isn’t flat — shim behind the wall cleat before remounting.
6. Sand and finish. Fill any nail holes, sand through 120 to 220, and apply your finish. For shelves that’ll hold books or ceramics, a wipe-on poly or water-based topcoat gives good protection without a lot of fuss.
Getting them level — the detail that matters
A shelf that’s 1/8“ out of level over 36“ is noticeable. Always use a proper level on the wall cleat before it’s screwed in — not after. Marks on the wall shift when you’re wrestling with the cleat. Put the level on first, mark both ends of the cleat, connect the marks, then drill.
For a run of multiple shelves at different heights, measure up from the floor at both ends of each shelf and compare. Floors aren’t always level, so measuring from the same reference point (the floor) can mislead you. Better to level each shelf independently with a spirit level.
Weight rating and common mistakes
What kills load capacity:
- Missing studs and relying on anchors
- Short screws that don’t bite deep into the stud
- A cleat that’s too narrow (less than 3/4“ glue surface)
- Shelf box that isn’t rigid — gaps in the glue joint let the box rack under load
What makes it bulletproof:
- Two 2.5“ screws per stud
- Full-length cleat (34“ in a 36“ shelf leaves 1“ clearance each side)
- Box assembled with glue and fasteners, not just nails
- Let everything cure before loading the shelf
Want plans for the whole wall?
This shelf is one part of the room. If you’re thinking about a full built-in — bookcase, media unit, storage wall — the planning and joinery get more involved. Our full TedsWoodworking review covers whether a large plan library is worth it for projects like that, and who it makes the most sense for.