How to Measure and Mark Wood Accurately
Most woodworking errors don't happen at the saw — they happen at the tape measure. Measurement mistakes compound: a line that's 1/32 in (1mm) off produces a joint that doesn't close, a panel that won't fit, or a project that finishes twisted. The good news is that accurate layout is a skill you can lock in early, and it doesn't require expensive tools.
Measuring accurately isn’t about hitting exact numbers — it’s about reducing the places where error can enter the process. Every time you transfer a measurement from a tape to a rule to a board, you add a chance for something to drift. Experienced woodworkers minimize those transfers. Beginners learn to make each one count.
Tape measure vs rule: use the right tool
A tape measure and a steel rule do different jobs.
Steel rule — for short, precise measurements. A good 12 in (300mm) or 24 in (600mm) rule lies flat on the workpiece, hooks solidly against an edge, and lets you mark directly from a division line. For anything under 24 in (600mm), a rule is more reliable than a tape.
Tape measure — for longer measurements, rough layout, and checking overall dimensions. Tapes have a loose hook at the end by design: the play equals the hook’s thickness, so whether you hook the end of a board or butt the tape against a wall, you’re reading from the same zero. This is correct. Don’t try to take it out.
Where beginners go wrong: trusting every tape measure equally. Cheap tapes wander. If you’re comparing cuts from two different tapes on the same project, you’ll end up with gaps. Pick one tape for a project and use it exclusively.
Pencil vs marking knife: know when each matters
| Tool | Best for | Why |
|---|---|---|
| Pencil (sharp HB or mechanical) | Rough layout, crosscut lines you’ll saw to the waste side of, setting up jigs | Visible, erasable, easy |
| Marking knife | Joinery lines, dovetails, mortises, any line you need to be precise | Severs fibers cleanly; gives the chisel or saw a wall to register against |
| Marking gauge | Parallel lines at a set distance from an edge (shoulders, tenon cheeks, rebates) | Consistent, repeatable — far better than measuring from scratch each time |
For beginners, a sharp pencil handles 80% of layout work. A marking knife becomes important when you’re cutting joinery and you want a crisp shoulder line with no ragged fibers. The knife leaves a groove — the tip of your chisel or saw tooth drops into it, and the cut starts exactly where you intended.
When you’re sawing to a pencil line, saw on the waste side of the line and leave the line visible. You can always remove more; you can’t put it back.
The square: your most important reference tool
A square does one thing: it tells you whether a line is 90 degrees to a reference edge. That reference edge is critical — a square is only as useful as the face you’re registering it against.
Try square — for checking and marking 90-degree lines across a face or end grain. Hold the stock firmly against the reference edge and bring the blade down to the surface before marking.
Combination square — a try square with a sliding rule and a 45-degree face. More versatile: use it for 90s, 45s, depth checks, and scribing parallel lines. The sliding head means you can lock a specific depth and repeat it across multiple pieces.
Speed square — a triangular square useful for crosscut lines on rough timber and quick 45/90 reference. Less precise than a try square for joinery, but fast for site-style work.
Checking your square: hold it against a known-straight edge, mark a line, flip the square over, and check whether the blade still aligns with the line. If it doesn’t, the square is out. A bad square makes everything worse — check yours before trusting it.
Reference faces and edges: work from the same datum
Pick one face and one edge on each piece as your reference surfaces — typically the flattest face and the straightest edge. Mark them with a face mark (a looping pencil stroke) and an edge mark (a tick mark pointing to the face). All measurements come off these surfaces.
Why this matters: if you measure from different faces on opposite ends of a board, any twist or bow in the stock introduces error into your layout. Measuring consistently from the same datum keeps parts square to each other even when the timber isn’t perfect.
For matched parts — drawer sides, cabinet rails, chair legs — always mark them together. Stack them, clamp them, and run the square across all of them at once. One line instead of four, and all four are identical.
Story sticks: measure without numbers
A story stick is a length of scrap — a thin batten or a piece of ply edge — where you record dimensions as physical marks rather than numbers. Instead of measuring 13 21/32 in (347mm), writing it down, and then measuring it again on the second piece, you hold the stick against the first piece and mark the shoulder directly. Then you hold it against the second piece and transfer the mark.
The advantage: you eliminate the read-off and re-measure step entirely. There’s no number to misread or misremember. The length is just a mark on a stick.
Story sticks are useful for:
- Cabinet openings (mark the actual opening width on the stick, transfer to the door panel)
- Repeated parts (legs, rails, shelf spacers)
- Fitting to an irregular space (scribe the opening, transfer to the piece)
A kitchen cabinet fitter will use a story stick to capture a whole wall’s worth of dimensions in one pass. The principle works at any scale.
“Measure twice, cut once” — what it actually means
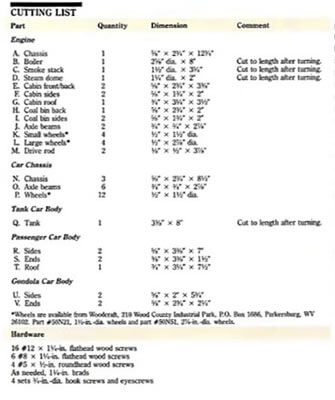
For the arithmetic side of this, the cut list calculator adds the blade kerf between every cut so the last piece off the board is still the length you wanted.
The instruction isn’t really about counting measures. It’s about verifying before committing. Before you cut, check:
- Is the measurement right? (Re-read it.)
- Is the mark in the right place? (Hold the piece in position if you can.)
- Are you cutting on the correct side of the line?
For critical parts — the last piece of an expensive board, a fit that needs to be exact — dry-fit first. Hold the uncut piece against its destination and mark from the actual opening rather than from a previous measurement. Rooms and cabinets are rarely exactly as drawn.
Common layout errors (and how to avoid them)
The hook gap — using a tape’s hook end for some measurements and the body-of-tape end for others. Pick one method per project.
Cumulative error — measuring each piece from the previous piece instead of all from a common datum. If each cut drifts 1/64 in (0.5mm), a set of six shelf pins is 1/8 in (3mm) off by the end.
Reading the wrong scale — combination squares often have both imperial and metric markings. Glance at which side you’re reading before you mark.
Marking with a worn pencil — a fat pencil line is 1/32 in (1mm) wide. The mark should be a thin line, and you should know which side of it the cut falls on. Sharp pencil or marking knife, every time.
How this fits with plans
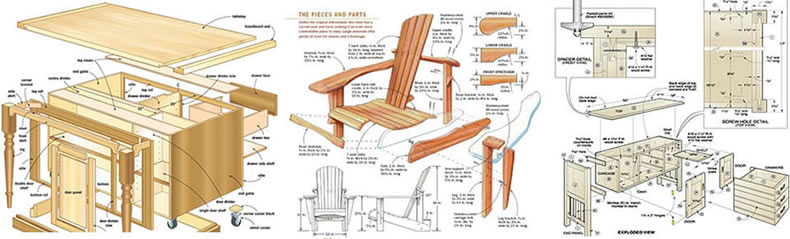
Accurate layout only works when the dimensions you’re laying out are correct to begin with. A plan that gives you precise cut-list dimensions and clear reference instructions is the difference between confident marking and guessing. Our guide to reading woodworking plans covers how to extract the right numbers before you pick up the tape.
If you’re evaluating where to find plans worth building from, our review of plan libraries looks at what a complete plan actually provides — dimensioned drawings, cut lists, and the sequencing information that tells you in what order to measure, cut, and assemble.