Wood Joints Explained: 6 Joints Every Beginner Should Know
You don't need to know every joint in the book. You need to know six. These are the ones that come up on almost every project, and once you understand them, you'll be able to read any plan and know exactly what's holding it together.
Joinery is how wood connects to wood. The joint you choose determines how strong a piece is, how it looks, and how long it’ll hold together. The good news: you don’t need to master twenty joints to build good furniture. You need six. Here they are, from simplest to most involved.
Before you get to any of these, make sure you’ve got the right tools. Our beginner tool guide covers the kit that handles all of these joints without spending a fortune.
1. Butt joint
What it is: Two pieces of wood where one end simply butts against the face or edge of another. No shaping. No interlocking. Just two surfaces meeting at a corner.
Strength: Low on its own. Relies entirely on glue and fasteners (screws, nails, brackets).
Difficulty: As easy as it gets — square cuts, nothing else.
When to use it: Carcass construction where you’re going to reinforce with screws anyway, rough framing, anything that’s hidden behind panels or inside a cabinet. Also the right starting point: once you understand why this joint is weak (end grain to face grain glue doesn’t hold well), you understand why every other joint exists.
The truth about butt joints: With enough screws and glue, a butt joint is adequate for a lot of everyday furniture. Most flat-pack furniture is essentially butt joints with cam locks. That doesn’t make it bad — it means knowing its limits.
2. Pocket-hole joint
What it is: A butt joint reinforced with a screw driven at an angle through a predrilled pocket. The pocket-hole jig cuts the angled hole and the right depth in one step.
Strength: Medium. Much stronger than a plain butt joint, not as strong as mortise-and-tenon. Holds well in most furniture applications.
Difficulty: Very easy once you have the jig. Kreg makes the most common one. Ten minutes to learn; usable on the same day.
When to use it: Face frames, cabinet boxes, table aprons, any place where you want a fast, strong joint that doesn’t need to be visible. This is the joint most beginners end up using the most.
Limitation: Not great for joints that’ll see a lot of racking force (side-to-side stress). For chair legs and joints under constant movement, you want something with more mechanical interlocking.
3. Dado joint
What it is: A channel (dado) cut across the grain of a board. A shelf or panel drops into the channel. The dado runs the full width of the board, from edge to edge.
Strength: Good. The shelf is supported along its entire width, not just at the edges.
Difficulty: Moderate. You need a router with a straight bit, or a table saw with a dado stack, or multiple passes with a circular saw and chisel to clean the waste. The cut has to be exactly the right width and depth to fit snugly.
When to use it: Shelf-in-a-bookcase construction. Any time you want a shelf to sit in a housing rather than just rest on a bracket. Also used for drawer bottoms and cabinet dividers.
Stopped dado: a variation where the channel doesn’t run all the way to the front edge, so the joint is invisible from the front. Slightly trickier to cut, much cleaner looking.
4. Rabbet joint
What it is: An L-shaped notch cut along the edge or end of a board. Another board fits into the notch. Think of it as a dado but at the end of the board, or along an edge rather than across it.
Strength: Better than a butt joint because there’s a mechanical ledge holding the pieces in place. Combine it with glue and it’s very solid.
Difficulty: Similar to a dado — router or table saw with the right setup. A hand router plane works well too.
When to use it: Cabinet backs (the back panel drops into a rabbet around the inside edge of the cabinet), drawer bottoms, box corners, and anywhere you want a bit more register than a plain butt joint gives you.
Rabbet vs dado: if the channel goes across the grain, it’s a dado. If it runs with the grain along an edge, or at the end of a board, it’s a rabbet. Same basic idea, different orientation.
5. Mortise-and-tenon joint
What it is: A rectangular peg (tenon) on one piece fits into a matching rectangular hole (mortise) in another. The original structural joint — it’s been used in timber framing and furniture for thousands of years.
Strength: High. One of the strongest joints in woodworking, especially under racking force.
Difficulty: Intermediate to Advanced depending on method. You can cut tenons with a table saw or router table quickly; mortises are more work (chisel and mallet by hand, or a drill press and chisel cleanup, or a dedicated mortising machine). Getting the fit right takes practice.
When to use it: Chair legs, table aprons, door frames, bed joints — any structural connection that’ll see stress from multiple directions over years of use. When something needs to last, this is the joint.
Loose vs tight: the tenon should slide in with hand pressure but no slop. Too tight and you split the mortise trying to assemble; too loose and glue alone won’t save it.
6. Dovetail joint
What it is: Interlocking wedge-shaped pins and tails cut at the ends of two boards. The geometry means the joint can only come apart in one direction — pull out or pull in, never apart. Used almost universally in drawer construction and box corners.
Strength: Very high — both mechanical and glue surface are maximised. The joint looks impressive because it is impressive.
Difficulty: High by hand; moderate with a router and dovetail jig. Hand-cut dovetails are a benchmark skill for experienced woodworkers. Don’t let that put you off: a jig-cut dovetail is still a genuine dovetail, and learning to cut them by hand is one of the most satisfying progressions in the craft.
When to use it: Drawer boxes, keepsake boxes, blanket chests, anything where the joint is visible and you want it to be. Also used in case construction (attaching case tops to sides) when strength and aesthetics both matter.
Half-blind dovetail: a version where the pins don’t go all the way through, so the joint is hidden from the front. Standard in traditional drawer construction — you see the wooden drawer front, not the joint.
Which joint for which job?
| Need | Joint |
|---|---|
| Fast cabinet box | Pocket-hole |
| Shelf in a bookcase | Dado |
| Cabinet back panel | Rabbet |
| Chair or table legs | Mortise-and-tenon |
| Drawers and boxes | Dovetail |
| Anything else, quickly | Butt + screws |
The progression most builders follow: butt joints on their first project, pocket holes on the second or third, dados and rabbets when they start building cabinets, mortise-and-tenon when they build their first table or chair, and dovetails when they want a challenge worth having.
A note on plans
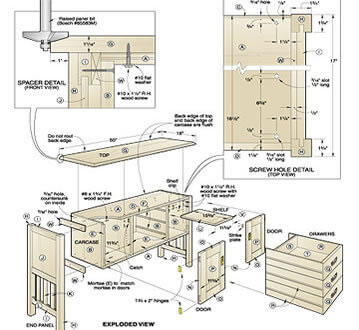
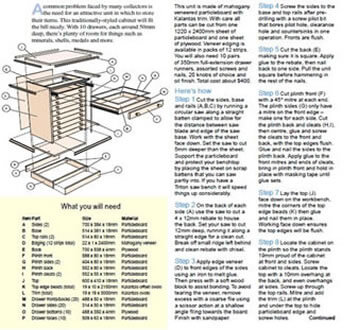
Knowing the joints is half the equation. The other half is seeing them applied in context — a cut list that shows where each joint lands, and a diagram that makes the assembly order obvious. If you’re working from plans that skip those details, you’re filling in blanks by guesswork. Our TedsWoodworking review covers what a solid plan library looks like in practice, and whether it’s worth having one before you start building.