How to Use a Circular Saw (Safely and Accurately)
A circular saw is the first power saw most woodworkers buy, and with good reason — it handles ripping, crosscutting, and breaking down full sheets without taking up any floor space. Getting accurate, repeatable cuts out of one is mostly a technique problem, not a gear problem.
A circular saw can do almost everything a table saw can do for a beginner’s first dozen projects. The difference is technique: a table saw keeps the workpiece against a fixed fence; with a circular saw, you are the fence. That’s where people go wrong. Here’s how to go right.
Before you pick up the saw, make sure you’ve got the basic kit sorted. Our woodworking tools for beginners guide covers what to buy first and what to skip.
Understanding the saw
A circular saw has a few key parts worth knowing before you switch it on.
- Shoe (base plate): the flat metal plate that rides along the workpiece. This is what you register against a guide.
- Blade guard: spring-loaded, retracts automatically as the cut starts. Never tie it back.
- Bevel adjustment: tilts the shoe to cut at an angle. For most beginner cuts you want this at 0°.
- Depth adjustment: controls how far the blade drops below the shoe. Set it so the blade clears the underside of the wood by about 1/4 to 3/8 in (6 to 10mm), no deeper. A blade buried 2 in into a 3/4 in board has a lot more tooth exposed than necessary.
- Safety trigger: most circular saws have a lock-off button plus the trigger. The saw won’t run unless you deliberately depress both. Learn this so it becomes automatic.
Blade choice
The blade matters more than most beginners expect. Using a 24-tooth framing blade on plywood tearout is a quick way to ruin a good panel.
| Blade | Tooth count | Best for |
|---|---|---|
| Framing / demo | 16–24T | Rough lumber, framing, fast cuts where tearout doesn’t matter |
| General purpose | 40T | Dimensional timber, most beginner projects |
| Plywood / melamine | 60–80T | Sheet goods, veneered panels, melamine — minimizes tearout |
| Fine crosscut | 60–80T | Trim, hardwood, finished cuts you won’t sand heavily |
For a first blade, a 40T general purpose blade gets you through most jobs. Keep a 60T or higher around for sheet goods.
Blade condition: a dull blade is dangerous. It requires more force, causes the saw to bind, and burns timber. If you’re leaning on the saw to make it move, the blade is done.
Setup and safety before every cut
- Unplug or remove the battery before changing blades, adjusting the bevel, or clearing debris.
- Mark your cut line clearly. A pencil line fine enough to split is worth taking the time to draw. Our guide to measuring and marking covers the marking habits that keep a cut list consistent.
- Set blade depth correctly. With the saw unplugged, hold it alongside the workpiece and adjust so the blade clears the bottom face by 1/4 to 3/8 in (6 to 10mm). Deeper than that and you’re just exposing more tooth to the air.
- Support the work properly. The offcut side needs support so it doesn’t drop and pinch the blade on the way through. Sawhorses or a sheet of foam on the ground work well for sheet goods. A workbench with clamps works for shorter pieces.
- Clear your cut path. Know where the cord is (for corded saws). Know where your hands are. The blade exits the bottom of the workpiece and keeps spinning briefly after the cut.
- Eye and ear protection. Not optional.
Making a straight cut
This is where most beginners struggle. The saw itself gives you a sight notch at the front of the shoe — a small V or arrow that’s supposed to line up with your cut line. The problem is that it’s not very precise, and any wander at the start amplifies itself over a long cut.
The fix is a guide.
Two cuts cover almost everything a beginner needs, and they want different guides. A crosscut runs across the grain, usually short, usually squaring the end of a board. A rip cut runs with the grain, usually long, and that is where drift does the most damage.
Crosscuts: using a speed square as a guide
For crosscuts up to about 16 in, clamp a speed square against the face of the workpiece and run the shoe of the saw against it. The square keeps the cut perfectly perpendicular. Mark your line, position the square so the blade lands on the waste side of the line, clamp or hold it firm, and push through.
Rip cuts: using a straight edge or guide rail
For rips or long straight cuts, clamp a straight piece of timber (or a commercial guide rail) parallel to your cut line. Measure the distance from the blade to the edge of the saw’s shoe — that’s your offset. Clamp the guide that distance away from your line, run the shoe against it, and the cut follows the guide rather than your hands.
A cheap but reliable option: a length of MDF with a factory-straight edge, clamped down. Make a sacrificial cut through it once to mark exactly where the blade falls. After that, line up the cut edge of the guide with your line and clamp.
Cutting sheet goods without a table
A full sheet of plywood is the cut that sends beginners shopping for a table saw. You do not need one. A circular saw is the better tool for breaking down a 4x8 sheet, because the saw moves and the sheet stays still.
Work on the floor. Lay a sheet of rigid foam insulation down, put the plywood on top of it, and set the blade depth so it cuts through the ply and about 1/4 in into the foam. The panel is supported along the entire cut, so nothing drops, nothing pinches, and the offcut cannot fall away and bind the blade. Two sawhorses with sacrificial timber across them do the same job at working height.
Cut the good face down. The blade enters from the bottom and exits through the top, so tearout lands on the top face. Pair that with a 60T or higher blade for veneered ply and melamine.
Break the sheet down before you cut to size. Rough-cut oversized pieces first, then trim each one to final dimension against a guide. Chasing a finished dimension on a full sheet means fighting the weight of the whole panel while you also try to hold a line.
If you are still choosing between panel materials, our plywood vs MDF vs solid wood comparison covers how each one cuts and what blade each one wants.
Why a circular saw kicks back
Kickback is the saw driving suddenly backward toward you, and it has one cause: the blade binds in the cut. Everything below is a version of that.
The offcut drops and pinches the blade. The most common version by a wide margin. The waste side loses support mid-cut, closes on the blade, and the saw climbs out of the kerf. Support both sides of the cut, every time.
The stock is warped or under tension. Cupped or twisted boards close behind the blade as the cut opens up, and internal tension in the timber does the same. Cut warped stock in shorter passes and expect it to move.
The blade is dull or wrong for the material. A dull blade needs force, and force is what turns a bind into a kick. Same story with a 24T framing blade in melamine.
Depth is set too deep. More tooth in the cut means more blade available to grab. Back to 1/4 to 3/8 in below the workpiece.
The saw got twisted mid-cut. Steering a drifting saw back toward the line presses the rear of the blade against one wall of the kerf. If a cut has wandered, stop, back out, and start again.
Two habits limit the damage when it happens anyway: stand to the side of the blade line rather than directly behind it, and keep both hands on the saw so it cannot twist out of your grip. If a cut binds and the saw stalls, release the trigger before you try to free it.
Common mistakes
Starting the cut before the blade is at full speed. Let it spin up before it touches the wood. Starting under load causes lurching and rough entry.
Forcing the cut. Let the saw move at its own pace. Pushing harder overloads the motor, causes the blade to wander, and heats the blade. If you’re pushing hard, something is wrong — dull blade, wrong blade for the material, or depth set too deep.
Cutting with the good face down. A circular saw’s blade enters from the bottom and exits through the top. That means tearout happens on the top face. For finished panels — plywood, veneer, melamine — cut with the good face down and use a fine-tooth blade.
Letting the cut length drift. On long cuts without a guide, even a slight wander builds up. A 1/8 in drift over 20 in is annoying. The same drift over an 8 ft sheet means a panel that won’t fit. Use a guide.
Not finishing the cut cleanly. Some beginners hesitate at the end of a cut and lift the saw before the blade has cleared. This pulls the cut out of line and can kick. Push through, let the blade clear, and then release the trigger.
Maintaining the saw
- Keep the shoe clean and flat. A warped or gummed-up shoe affects cut accuracy.
- Keep blades sharp. Carbide-tipped blades can be resharpened; cheaper steel blades usually get replaced.
- Blow sawdust out of the blade guard regularly — clogged guards don’t retract cleanly.
- Store with the blade guard down, cord coiled, blade not exposed.
Common questions
How do you use a circular saw for the first time?
Make a few practice cuts in scrap before anything that matters. Set the blade depth 1/4 to 3/8 in below the material, clamp the workpiece, clamp a speed square as a guide, let the blade reach full speed off the wood, then push through at the saw’s own pace. Three cuts in scrap teach more than any amount of reading.
Can you use a circular saw without a table?
Yes, and for sheet goods it is the better option. Lay the panel on rigid foam on the floor, or across sawhorses with sacrificial timber, and set the blade to cut just through the material. The sheet stays supported along the whole cut.
How do you cut straight with a circular saw?
Use a guide, not the sight notch. A clamped speed square for crosscuts, a clamped straight edge or guide rail for rips. Measure the offset from the blade to the edge of the shoe once, then write it on the guide so you never measure it again.
Why does a circular saw kick back?
Because the blade binds in the cut. Usually the offcut dropped and pinched it, the blade is dull, the depth is set too deep, or the saw got twisted mid-cut.
What blade do you use for plywood?
60T or higher, cutting with the good face down. A 40T general purpose blade will get through ply, but it leaves tearout on the top face that you then have to sand or hide.
A note on plans
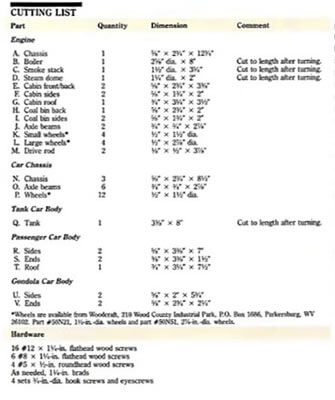
Accurate cuts start with accurate measurements. A complete plan with a real cut list tells you exactly what dimensions each piece needs to be — which means you know what to cut, not just roughly what size. If your current plans are leaving you guessing, our review of plan libraries covers what a well-documented plan actually provides and whether a larger collection is worth it.