How to Build a Wooden Jewelry Box
A jewelry box is one of those builds where the size works in your favor. Small parts mean less material cost, shorter glue-up sessions, and mistakes that are easy to fix. The result is something people genuinely want to own.
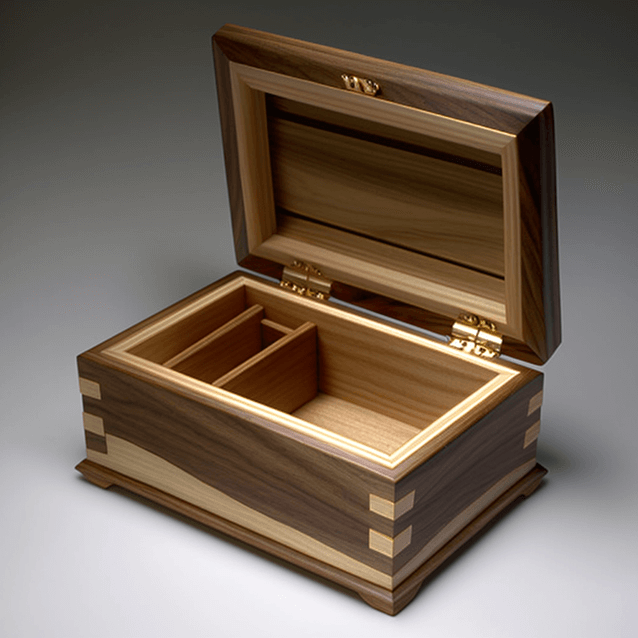
A jewelry box is a great third or fourth project. You’re not fighting large panels or heavy stock — everything is small, the cuts are straightforward, and the joinery is as simple as butt joints reinforced with glue. The payoff is outsized: a well-finished small box looks like real craftsmanship even when the techniques behind it are basic.
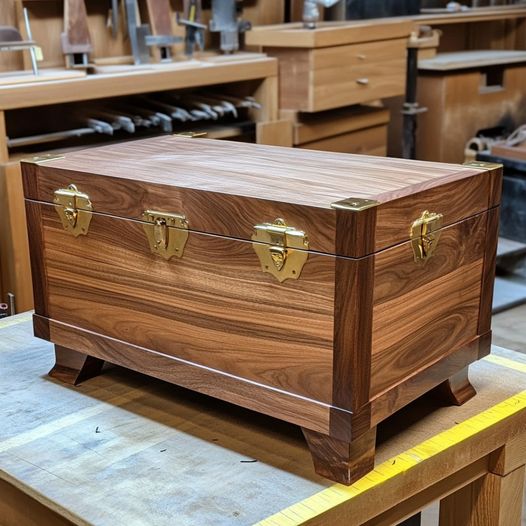
This plan builds a hinged-lid box with interior dimensions of roughly 9“ × 6“ × 3“. Big enough to hold a collection, small enough to sit on a dresser without dominating it.
What you’ll need
Tools:
- Miter saw or hand saw with a miter box
- Drill/driver
- Random orbit sander or sandpaper block
- Tape measure and speed square
- Clamps (four small bar or spring clamps)
- Router with a small roundover bit (optional, for edge detail)
- Chisel (for hinge mortises)
No table saw required. If you’ve built a picture frame before, you already know what clean miter cuts feel like — that same discipline carries here.
Materials:
- Hardwood board for the sides and lid: roughly 4 board-feet of ¾“ stock (cherry, walnut, maple, or poplar all work)
- ¼“ plywood for the bottom panel
- Small brass hinges (2×, ¾“ or 1“ leaf)
- Small brass clasp or box latch (optional)
- Wood glue
- 80, 120, and 220-grit sandpaper
- Finish of choice — shellac, wipe-on poly, or Danish oil all suit small boxes
The cut list
| Part | Material | Size | Qty |
|---|---|---|---|
| Front / back | ¾“ solid wood | 9“ × 3“ | 2 |
| Sides | ¾“ solid wood | 6“ × 3“ | 2 |
| Bottom | ¼“ plywood | 8.5“ × 5.5“ | 1 |
| Lid | ¾“ solid wood | 9.5“ × 6.5“ | 1 |
The lid overhangs the box by ¼“ on all sides — that slight overhang registers the lid visually and hides any minor gaps at the hinge line.
Step by step
1. Mill and cut the parts. Get your stock to consistent thickness first. Even ¼“ variation in the side boards will show at the corners. Cut the front, back, and sides to final length. Cut the bottom panel from ¼“ plywood.
2. Cut the bottom groove (optional but cleaner). If you have a router table or a dado stack, run a groove ¼“ deep along the inside bottom edge of all four sides before assembly. The plywood bottom floats in the groove instead of sitting on top of the base pieces — cleaner look, no exposed plywood edge. If you skip this, simply glue the bottom panel to the inside base after assembly.
3. Dry-fit first. Before any glue, clamp all four sides together around the bottom panel and confirm everything is square and flat. Fix any gaps now.
4. Glue up the box. Apply glue to the corner joints (front/back to sides), slide the bottom panel into the groove or set it in place, and clamp. Use a rubber mallet to seat corners fully. Check for square with a tape measure across the diagonals — equal diagonals means square. Let cure for an hour minimum.
5. Sand the exterior. Work through 80 (to knock down glue squeeze-out and any surface inconsistency), 120, then 220 grit. Ease every outside edge slightly — sharp edges on a box feel cheap and chip easily.
6. Make the lid. Cut the lid panel to size. If you want a decorative edge, run a small roundover or chamfer around the bottom face of the lid using your router. Sand the lid to 220 the same as the box.
7. Fit the hinges. Mark the hinge locations on the back of the box and the corresponding edge of the lid — typically centered at about 1.5“ from each end. Use a chisel to cut shallow mortises so the hinge leaves sit flush. This is the fiddliest step: go slow, pare thin shavings, and test-fit often. Screw the hinges in with the box closed to confirm alignment before tightening fully.
8. Add a clasp (optional). A small brass box clasp on the front adds a finished look and keeps the lid shut. Center it, drill pilot holes, and screw in place.
9. Apply finish. Wipe-on poly or shellac are forgiving on small surfaces. Two thin coats, sanding lightly with 220 between coats. On the interior, one coat of shellac is enough — it’s friendly to metal jewelry and dries fast.
Mistakes to avoid
Skipping the dry-fit. Small boxes have small margins. A gap that looks minor dry will look worse with glue in it and no time to adjust. Always dry-clamp first.
Rushing the hinge mortises. Hinges that sit proud of the surface prevent the lid from closing flat. Mortises that go too deep make the lid bind and gap at the front. Take the time to sneak up on the fit — it’s the difference between a box that feels handmade and one that feels finished.
Over-finishing the interior. You don’t need three coats of poly inside a box holding jewelry. One light coat of shellac is enough. Heavy interior finish traps solvent smell and feels out of place.
Inconsistent stock thickness. If your sides aren’t all the same thickness, the corners won’t be flush and the lid won’t close evenly. If you’re not milling your own lumber, verify each piece with calipers before cutting.
Want plans for hundreds more small builds?
If you enjoyed this kind of project — manageable size, satisfying result — our full TedsWoodworking review covers a plan library that includes small boxes, frames, and furniture at every skill level.