How to Build a Kitchen Island
A kitchen island is where the project starts to feel like furniture-making rather than basic carpentry. The build isn't complicated, but the tolerances are tighter, the material cost is real, and the result will be used hard every day. Worth getting right.
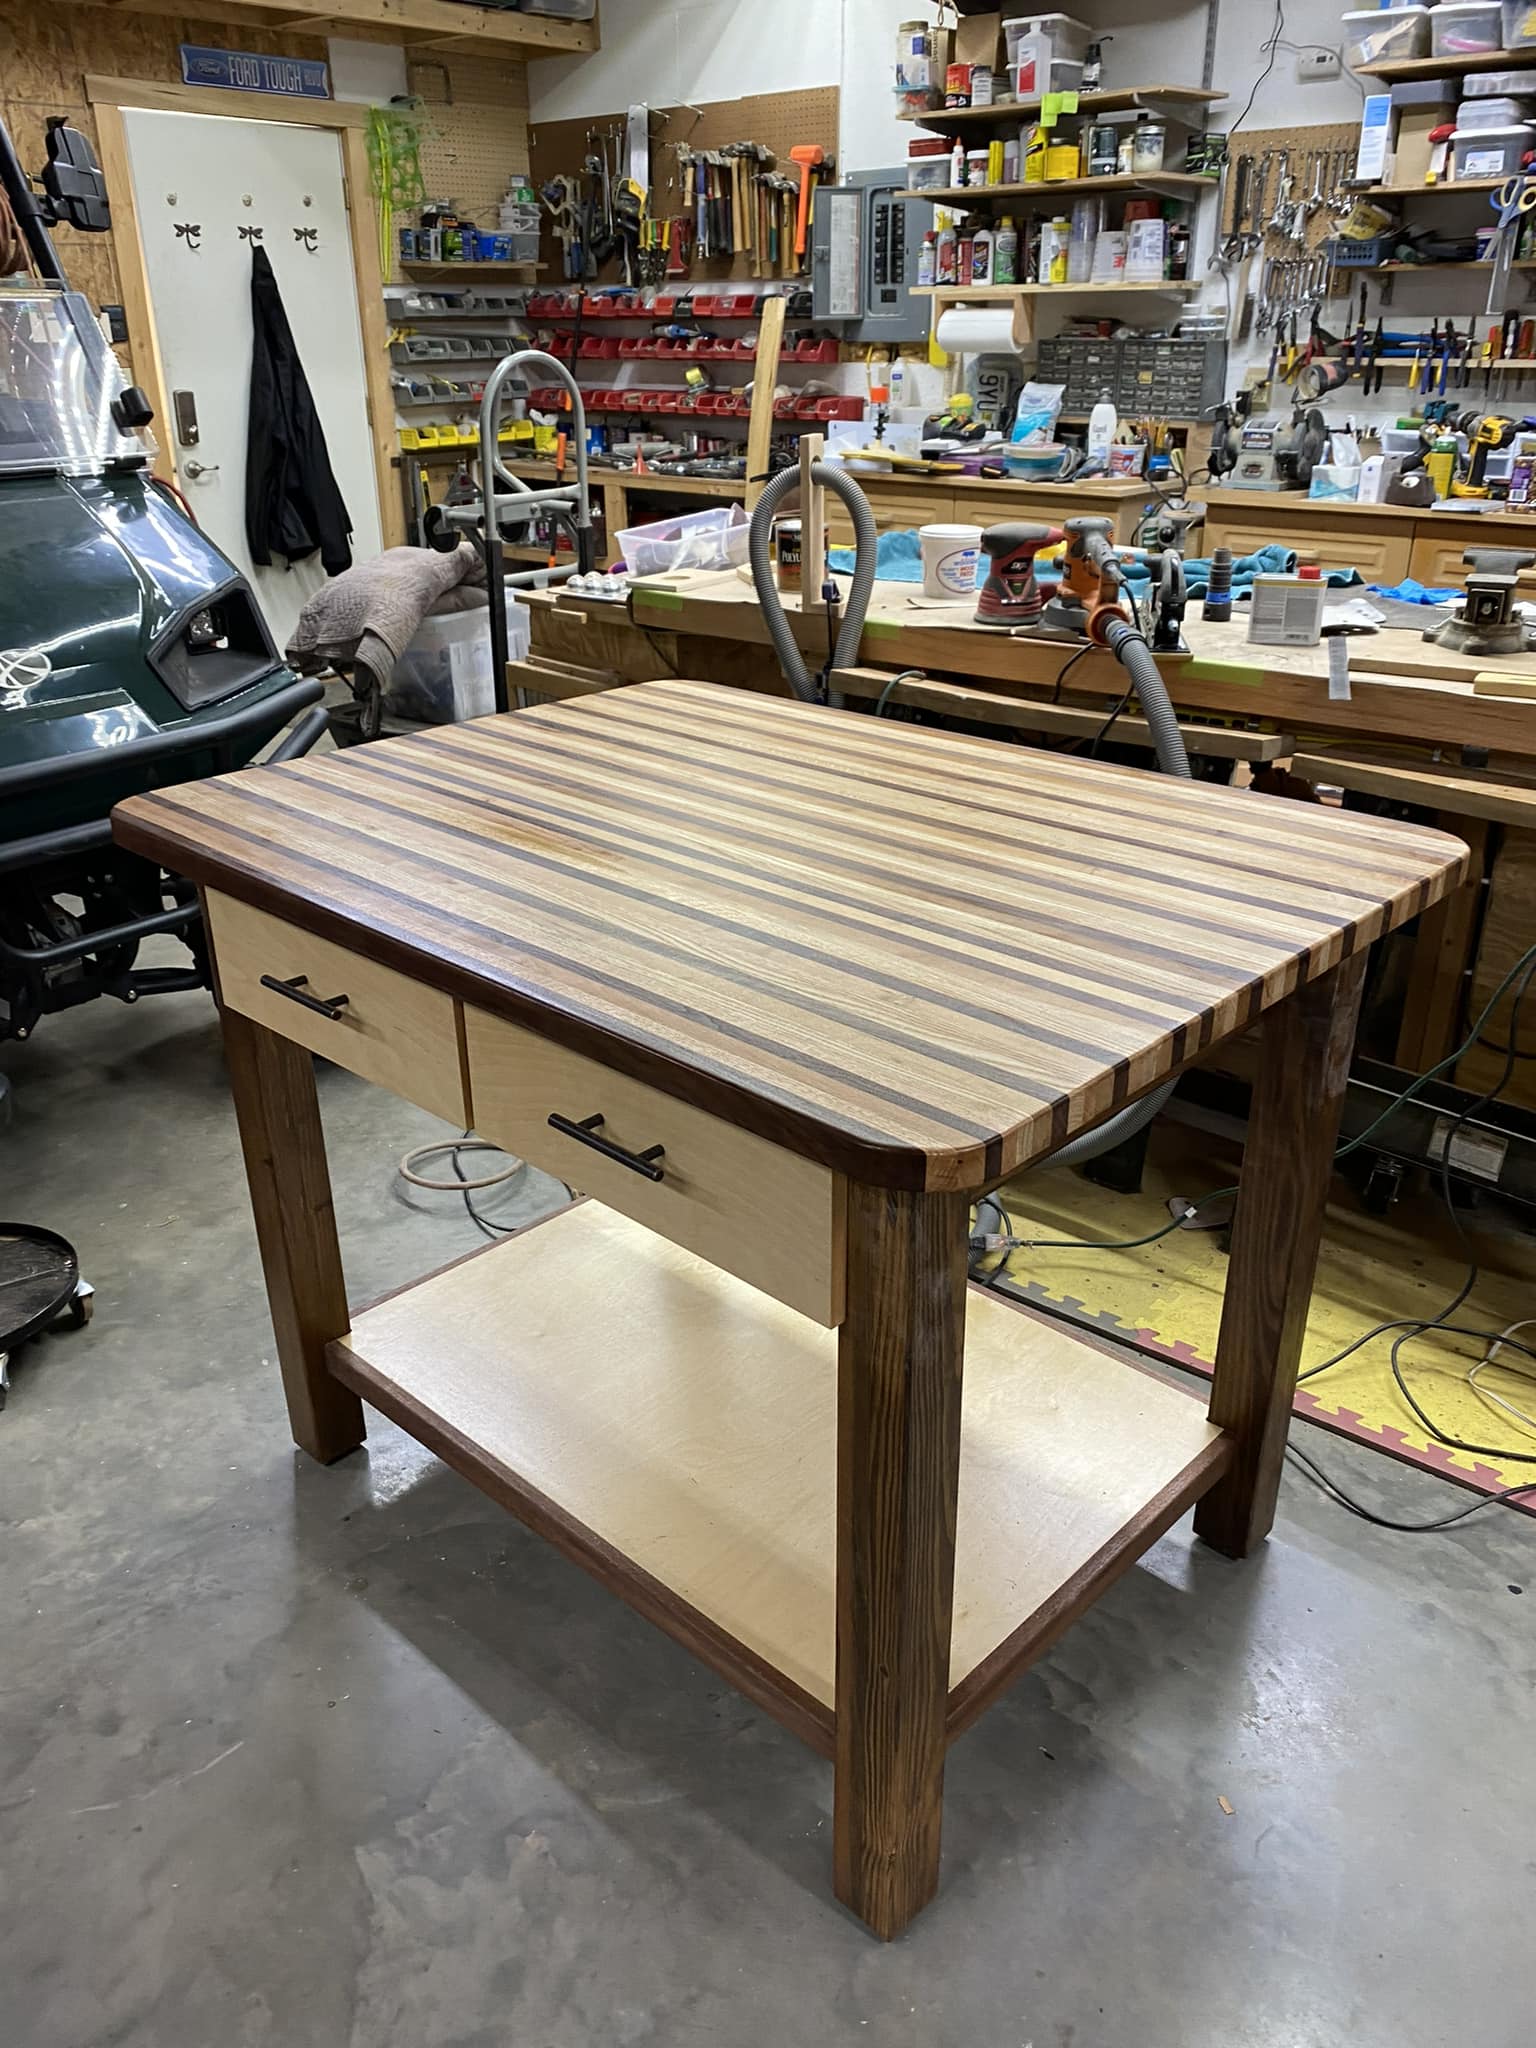
A kitchen island gives you extra prep surface, hidden storage, and a piece of furniture that genuinely earns its floor space. The version in this plan is a freestanding island with a butcher-block-style top and open shelving below — no plumbing, no electrical, no cabinetry hardware required. Freestanding also means you can move it or take it with you.
This is an intermediate build, not because any single step is hard, but because there are more of them, the dimensions need to be accurate (you’re working around a kitchen), and the top needs proper treatment to handle food prep and regular cleaning. If you haven’t built a workbench yet, that’s a good warm-up — it uses the same base structure at a different scale.
Finished dimensions: 48“ long × 24“ deep × 36“ tall (standard counter height). Adjust width to suit your kitchen.
What you’ll need
Tools:
- Miter saw or circular saw
- Drill/driver
- Pocket-hole jig
- Random orbit sander
- Router with roundover bit (optional — for softening top edges)
- Tape measure and speed square
- Clamps (six or more recommended)
- Level
Materials:
- 4× legs at 1.75“ × 1.75“ × 35.25“ (hard maple or poplar — something dense that won’t dent under daily use)
- Apron lumber: 1× 4 boards for the top aprons, 1× 6 for the lower stretchers
- 1× butcher block panel or glued-up hardwood top, 48“ × 24“ × 1.5“
- ¾“ plywood for the lower shelf (optional)
- 1.25“ and 2“ pocket screws
- Wood glue
- Tabletop fasteners or figure-8 clips (essential — do not skip these)
- 80, 120, and 220-grit sandpaper
- Food-safe finish for the top: pure tung oil, food-safe mineral oil, or a hardening oil blend like Rubio Monocoat
The cut list
| Part | Material | Size | Qty |
|---|---|---|---|
| Legs | 1.75“ × 1.75“ hardwood | 35.25“ | 4 |
| Long top aprons | 1× 4 | 40.5“ | 2 |
| Short top aprons | 1× 4 | 19“ | 2 |
| Long lower stretchers | 1× 6 | 40.5“ | 2 |
| Short lower stretchers | 1× 6 | 19“ | 2 |
| Top | butcher block or solid panel | 48“ × 24“ × 1.5“ | 1 |
| Lower shelf | ¾“ plywood | 21“ × 38“ | 1 |
The 1.75“ legs give the island visual weight appropriate for a kitchen — 1.5“ legs look a bit spindly at this scale. If you can’t source 1.75“ square stock, laminate two pieces of ¾“ material and rip to square.
Step by step
1. Mill and prep the legs. Get all four legs to identical length before anything else. A kitchen counter sits at 36“ — your legs need to be 35.25“ to account for the 1.5“ top and the ¼“ you’ll take off the foot pads if you add them. Sand the face grain to 120 grit now, while they’re loose.
2. Drill pocket holes in all aprons and stretchers. Drill two pocket holes at each end of every apron and stretcher board. On the top aprons, drill on the inside face. On the lower stretchers, you can drill from the bottom face — they won’t be visible anyway.
3. Assemble the short end frames. Join two legs with a short top apron and a short lower stretcher. The top apron sits ¾“ down from the top of the leg. The lower stretcher sits 6“ up from the bottom — high enough for clearance and storage, low enough for stability. Glue, clamp, pocket screw, check square. Build both short frames, let them sit 20 minutes.
4. Connect the long sides. Stand both end frames upright and join them with the four long boards — long top aprons at the top, long lower stretchers at the bottom. This is where you need a helper or creative clamping to keep everything upright while you drive screws. Check that all four legs contact a flat floor and that the frame isn’t racking before the glue cures.
5. Add the lower shelf (optional). Drop the plywood shelf down onto the lower stretchers and fasten from below with 1“ screws. Leave a small gap (⅛“) around the perimeter if the shelf is solid wood. Plywood can sit tight.
6. Attach the top with tabletop fasteners. Do not screw the top down rigid. A 48“ solid wood top needs to expand and contract seasonally — if you fix it completely, something will crack or the apron will pull away. Use figure-8 clips or proprietary tabletop fasteners, set into the top edge of the aprons. These allow the top to breathe while holding it securely.
Center the top on the base. There should be a 1.5“ overhang on all sides if you want a place to rest your hands or hang a small towel bar. Hook the fasteners and tighten.
7. Flatten and finish the top. If you bought a pre-made butcher block panel, check it with a straightedge — some come slightly cupped from the warehouse. A hand plane or a belt sander can take it flat before finishing. Work through 80, 120, and 220 grit.
Apply your food-safe finish according to the product instructions. Mineral oil soaks in fast and is inexpensive but needs refreshing every few months. Rubio Monocoat or a hardening oil blend cures harder and doesn’t need as much maintenance. Either is a better choice than poly for a food-prep surface.
8. Level the island. Set the island in its final position and check for level. Adjustable leveling feet hidden under the base are the cleanest solution. If you’re using plain feet, shim with felt pads until the surface reads level in both directions.
Mistakes to avoid
Rigidly fastening the top. This is the most common kitchen island mistake. A solid wood top that can’t move with seasonal humidity will crack, pull screws, or buckle. Tabletop fasteners are not optional here.
Undersized legs. At counter height with a heavy top loaded with bowls and cutting boards, 1.5“ legs will feel slightly springy. Go to 1.75“ or 2“ square — the visual presence is better too.
Applying poly to a butcher block top. Poly builds a film on the surface. When it scratches or chips (and it will, on a prep surface), you’re left with flaking finish in your food. Oil-based or penetrating finishes are the right call for kitchen work surfaces.
Not checking the frame for square before the glue cures. A racking island will look odd no matter how good the top is. Measure diagonals on the top and bottom frames before you walk away. They should match within 1/16“.
Building too wide for the space. Measure your kitchen floor plan and walk-path clearance before you cut a single piece. You need at least 36–42“ of clearance on all sides of the island for comfortable use. A 48“ island in a tight kitchen is a bruised-hip machine.
Want complete plans for hundreds of furniture projects?
This is one island plan. If you want dimensioned drawings, cut lists, and step-by-step instructions for thousands of woodworking projects in one library, our full TedsWoodworking review covers what’s in the package and who it’s genuinely useful for.